


Christmas season has officially started and we are ready to decorate our homes and even our offices with all the amazing things we can create with our POLI-FLEX vinyls.
Whether you want decorate pillowcases, gift cards, stockings or even wood decorations. There are endless options to make your home festive in your own unique way with our POLI-FLEX vinyls.
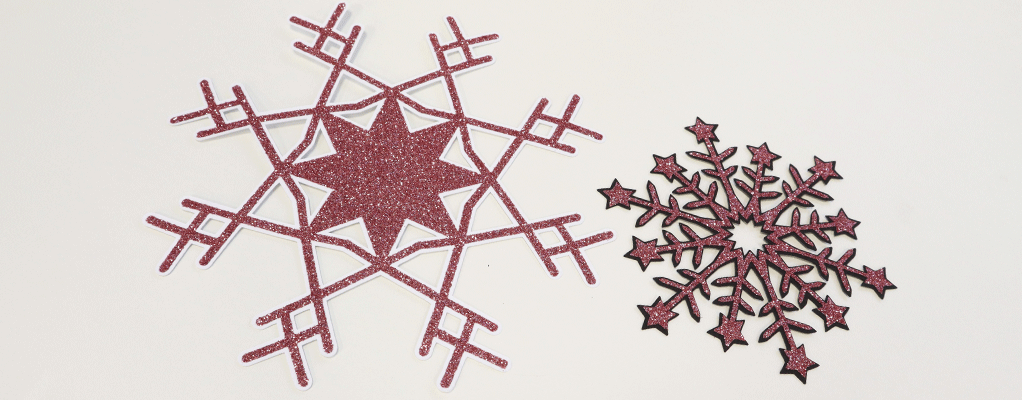
For inspiration, we have the perfect “DIY SNOWFLAKE ORNAMENT” tutorial for you!
All you need for these glittery eye catchers is:
- A plotter
- A heat press or iron
- Cardboard
- Ribbon
- our POLI-FLEX PEARL GLITTER in your favorite color (or your favorite heat transfer vinyl)


It only takes 5 easy steps to create your ornaments:
1.Step: Get your design ready for your plotter.
(IMPORTANT: You need the snowflake or your chosen design twice. One of them has to be bigger than the other one, so that the vinyl perfectly fits onto the cardboard. To enlarge the snowflake the right way, it must be given an outline and then converted into a cuttable surface.)
2.Step: Cut the bigger design out of cardboard and the smaller one out of your vinyl with your plotter and weed the cardboard, as well as the vinyl.
3.Step: Press your vinyl onto the cardboard at 320°F for 15 seconds with your heat press and peel off the liner.
4.Step: Take a piece of ribbon and tie it to the snowflake.
5.Step: Hang your snowflake on your Christmas tree and enjoy your sparkling tree. (You can also skip Step 4 and glue them on you window or wall.)
(If you do not own a plotter, you can also get a template and cut the cardboard and vinyl with scissors.)

